When I returned to Skye Five a few weeks after installing the new windows, I was less than thrilled at what I saw. The small front windows seemed fine but the much longer salon windows were showing signs that the acrylic was lifting away from the adhesive tape and the the Sikaflex was separating from the forward and aft edges. This was most apparent on the side that received the majority of the hot summer sunshine. It seems that this window may be just too long for this mounting method, as thermal expansion over the four foot length was too much for the adhesive and caulking to tolerate.
During my winterisation visit in October I recaulked the forward and aft edges of this window and hope that it will remain watertight until I can reassess the situation in the spring. I already have a relatively simple fix in mind, and will keep you informed.
If you own an older boat, you are likely to encounter leaking windows, hatches and portlights. The end result, at best, will be mouldy seat cushions and damp bedding – or at worst rotten woodwork or overflowing bilges. I have been chasing leaks on Skye Five ever since my wife, Karen, and I, took ownership seven years ago. For the most part, I have tackled problems immediately, nipping leaks in the bud. However, it takes a whole day to reach Skye Five from our home in the BC Interior, and that means she may go for as much as five long winter months without a visit, which is more than I like and the main reason we own a fiberglass boat rather than a wooden one.
The old windows leaked despite many emergency repairs.
The windows have been particularly troublesome, as a previous owner unsuccessfully replaced the originals with a modified system. Every time it rained, water would find its way through labyrinthine passages in the caulking and dampen vulnerable parts of the interior. I had made numerous emergency repairs which were temporary at best, and knew that the only real solution would be total replacement. Over time I also noticed stress cracks radiating from the stainless steel screws fixing the acrylic into place. This is a common issue caused by different rates of thermal expansion of the acrylic and cabin. This stresses the acrylic and this stress is concentrated around mechanical fastenings. It’s the reason why the holes accepting these fastenings should be oversize, with the fastening accurately centered, allowing for unconstrained expansion and contraction. Even so, the acrylic often de-bonds from the caulking, allowing seepage of water.
Now, I didn’t want to repeat the previous owner’s efforts, so I was prepared to try something new. I had heard of others using 3M VHB (Very High Bond) tape, to bond the acrylic to the cabin sides, eliminating the need for mechanical fastenings completely.
The first challenge was sourcing the tape and acrylic. In both cases my options were suboptimal. I wanted one inch wide, 3M VHB 5962 tape, but had to settle for 3M VHB 5952, which is thinner and less able to absorb surface imperfections on the cabin sides. I also could not source the 3M adhesion promoter which is claimed to increase bond strength. I did find the correct tape in the US but these suppliers would not ship to Canada. Uline Canada supplied the 1″ wide tape in a 36 yard roll, twice what I needed. It would be shipped from the US. The cost including tax and shipping was $283 CDN.
The acrylic came by special order, cut approximately to size, from a sheet of 3/16″ (4mm) acrylic with a bronze tint. Total cost including taxes was $268 CDN from Redwood Plastics and Rubber in Langley, BC. Fortunately, I pass by them on my way to Skye Five, so no shipping costs were incurred. I actually wanted 5mm thick acrylic but couldn’t get it, and 6mm would have been too thick. Note that we use the boat for coastal sailing and offshore use would demand stronger windows. However, as you will see, there would have been difficulties using the thicker acrylic.
I would tackle the project on the dock, exposed to the elements. Thankfully the weather, for the most part, was kind to me, although when I set to work in early June it was unusually cold and damp. I removed the aluminum custom frames covering the edges of the old windows, pulled out the small screws holding the windows in place and then pried them from the leaky caulking. Not surprisingly, they snapped like the proverbial carrots when I used a screwdriver to lift them. The fractures originated from the micro-cracks around the fastening holes and clearly these windows were significantly weakened.
Removing the old Sikaflex from the rabbets was tedious and time consuming and the remaining surface was too rough and uneven to take new acrylic held in place with 3M tape. But now the new windows would be an extra one and three quarter inches all around; three quarters for the rabbet and one inch for the tape on the surrounding cabin sides. Fortunately, I had anticipated this when I had the blanks cut so they were big enough to do the job. I cleaned up the rabbets the best I could, then masked and spray painted them beige.
The next step was to temporarily fix the blanks on one side into position, using wooden blocks hot glued under them to support the weight. From inside the cabin I drew an outline of the rabbit on the protective film covering the blank. After removing them I added one inch all around, then carefully cut with a jigsaw and finished the edges by sanding. The windows for the other side were copied from these as they were identical.
Rabbits painted (looks fine through tinted acrylic) and tape applied.
I then re-glued the wooden blocks to precisely position the windows in the vertical, and used an alignment mark for the horizontal. The mating hull surfaces were lightly sanded, degreased, and the tape applied. The acrylic had a protective film covering both sides. As I was unable to source the appropriate adhesion promoter, I decided to remove the film and bond the acrylic to the tape before the surface could be contaminated. With the film gone, and before removing the tape backing, I put the windows on the support blocks and aligned them horizontally to the marks. Using tweezers I carefully started removing the tape backing, working top and bottom from one end of the window to the other; it would have been too difficult to single-handedly try and fit a floppy, four foot long window by trying to align correctly first time, as any accidental contact would be pretty much permanent.
The technique worked well, and after the windows were in place I removed tape overhangs with a utility knife. It was now time to put some pressure on the edges to ensure contact with the tape. This is where things didn’t go quite as planned. Despite careful preparation, the cabin sides, although seeming fair to the eye, actually had undulations and imperfections which the acrylic couldn’t accommodate – it was just too stiff. This could be seen when looking through the acrylic and was especially noticeable with the small forward windows. Turns out, in this part of the cabin, there was a small amount of compound curvature. I applied pressure by using the soft rubber top of my telescoping boat hook – I could put my weight behind it and this bent the acrylic enough to increase the contact area but it didn’t completely remove the air gaps.
Trimming the tape overhangs.
I finished the job by running a bead of Sikaflex around the edges of the windows. This was my backup to prevent water penetration. The end results certainly look good to my eyes but for now there is a question mark around durability.
A finished forward window with Sikaflex bead.
To summarise, if you intend to try this technique, first make sure your hull sides are fair enough and free from compound curvature, otherwise you could run into problems – especially when using thicker, and therefore stiffer, acrylic. I can’t comment on how thicker tape would have performed or whether an adhesion promoter was important but I suspect both may have helped.
The end results certainly look good to my eyes but for now there is a question mark around durability. Watch this space for updates!
It took about 30 hours of sanding and painting to refinish Rainbird’s hull.
Over the last 30 years I’ve painted several large wooden boats. If you haven’t done it before it can seem a daunting task, but as I will explain here, with some careful planning it can be done successfully with minimal equipment and materials costs. By painting, I mean good technique with roller and brush and not spray painting – a more demanding and costly alternative. You will need to adapt the materials and techniques to whatever you have available in your part of the world.
The best paint systems – in terms of durability – are two part polyurethanes. Unfortunately, for the boat owner operating on a tight budget they are usually out of the question unless you have the well-controlled conditions needed to spray them. Many years ago I did paint a 36’ catamaran with a two-part system, using a roller and brush but it was difficult and stressful and I wasn’t entirely happy with the results. Two of us worked outdoors and by luck, it happened during a wonderful break in the weather but I would not risk it again.
The last boat I painted, Rainbird, a 33 foot Bill Garden sloop, was prepped and painted, single handed, in a week. It was hard, dusty work but my timing, weather wise, was good. I had Rainbird hauled out at Maple Bay on the east side of Vancouver Island, at a yard that allows owners to work on their boats. Historically this time of year is often sunny but not too warm – perfect for hours of sanding and applying paint.
Rainbird had been painted by the previous owners with a single-part Z-Spar yacht enamel approximately ten years earlier. Her red cedar, cold-molded hull was epoxy coated but not sheathed. The teal blue paint had turned very chalky. There were a few cracks in the paint and some minor peeling but the overall the integrity was good. All it needed was sanding and some minor repairs before applying a fresh coat of paint.
The yard kindly lent me some boards and supports to build a scaffold. I hooked up my orbital sander to a vacuum cleaner and set to work. It was hard, dusty work and I was happy that I could use the marina’s showers at the end of each day. I just worked my way around the boat, with two random orbital sanders, one with 80 grit and the other with 120 for finishing. I believe I used around 70 of the Velcro type sanding pads. This is a big boat and yes, if you looked closely at the finished job you might see swirls from the sanders – I didn’t have the time or energy to go for a perfect finish. I just needed a finish that would adhere well and last for another ten years.
Once I had thoroughly sanded the hull I washed it down with fresh water and dried it with clean cloths to remove the last traces of paint dust.
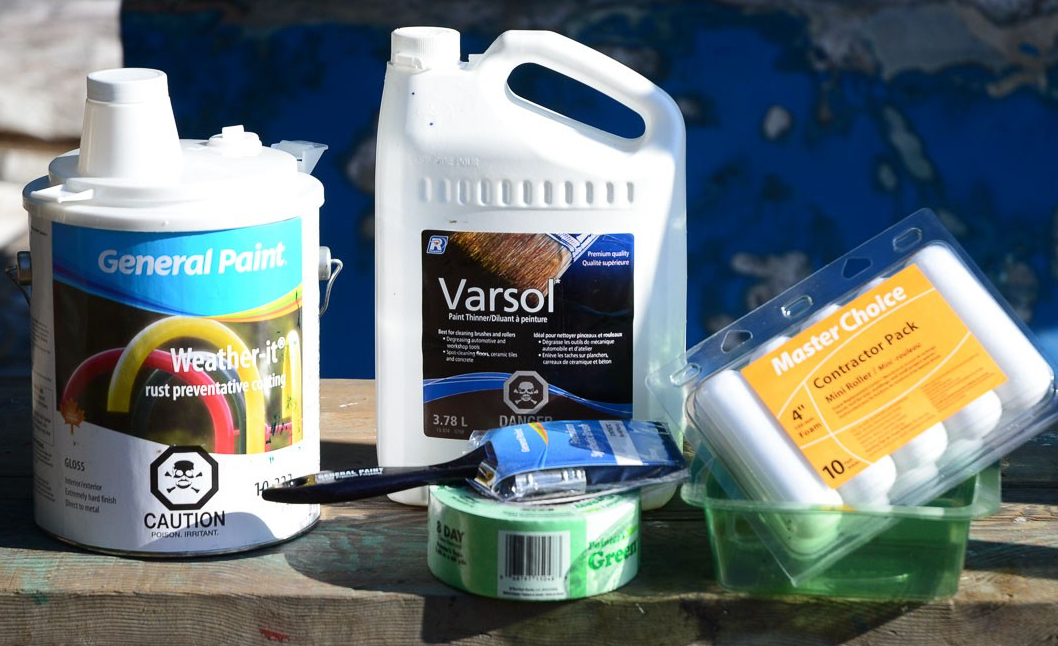
Some of the essentials.
The late summer mornings were damp so I would wipe away condensation prior to painting. The boat was oriented north/south so I only painted the side out of the sun. I painted a whole side without stopping to avoid an unsightly overlap.
I had painted Rainbird’s decks and cabin with General Paint’s Weather-it three years earlier and was very happy with the results. It was easy to apply and still looked as good as new. The paint was intended for commercial steel work and as Rainbird’s cold-molded hull was unlikely to move much I felt this paint would be a good match. It was also considerably cheaper than yacht enamel.
I bought some brushing thinners and a quality 3” brush. I would apply the paint with a 4” roller and then “tip off” the freshly laid paint with the brush. I always had a second brush at hand incase the first became contaminated.
With the sanding complete it’s time to start painting.
Painting a side took about 3 hours. I would apply a vertical panel of paint about 18” wide with the roller and then “tip-off” with the brush. Speed is essential because you need to maintain the wet edge. Having a second pair of hands would have been very useful because one could apply paint with the roller while the other “tips-off”. You will probably need a brushing thinner – the exact amount depends on how fast you are working as well as temperature, humidity and wind.
Luckily the wind (and bugs) held off and the daytime high stayed below 20C. The first coat looked fantastic. I was planning a second coat but the weather broke. Unfortunately, I needed to return home and yard fees together with the prospect of fall weather didn’t make a holding-off for a second coat practical.
I dodged showers while antifouling and doing some mechanical work. Rainbird went back into the water ten days after she was hauled. I was very happy with her new paint job.
********
If you enjoy my blog you might like to read about my sailing adventure on the west coast of Britain. “Suilven’s Travels” tells how I sold my home and with my partner Jill Brown, built a 26′ Wharram catamaran which we sailed around the coasts of England, Wales, Scotland and Ireland. “Suilven’s Travels” is available as an ebook for $4.99 on Amazon and the proceeds help support this blog.